Showing posts with label CSA. Show all posts

Thursday, April 13, 2017

A Very CSA Seder

The overwhelming majority of the time, I’m writing about other people’s cooking here. And for good reason: it’s a lot better and more interesting than my own cooking. Not that we don’t use our home kitchen – contrary to how it might appear sometimes, we don’t dine out every single night, and we do try, with varying degrees of success, to have at least a few home cooked meals each week. Occasionally, the results might even warrant an Instagram post, especially if I’m using something from my Little River Coop CSA, or the backyard garden. Rarely are they worth writing home about. But after cooking a Seder dinner for family and friends earlier this week, I was proud enough of the results to spend a little time memorializing it.

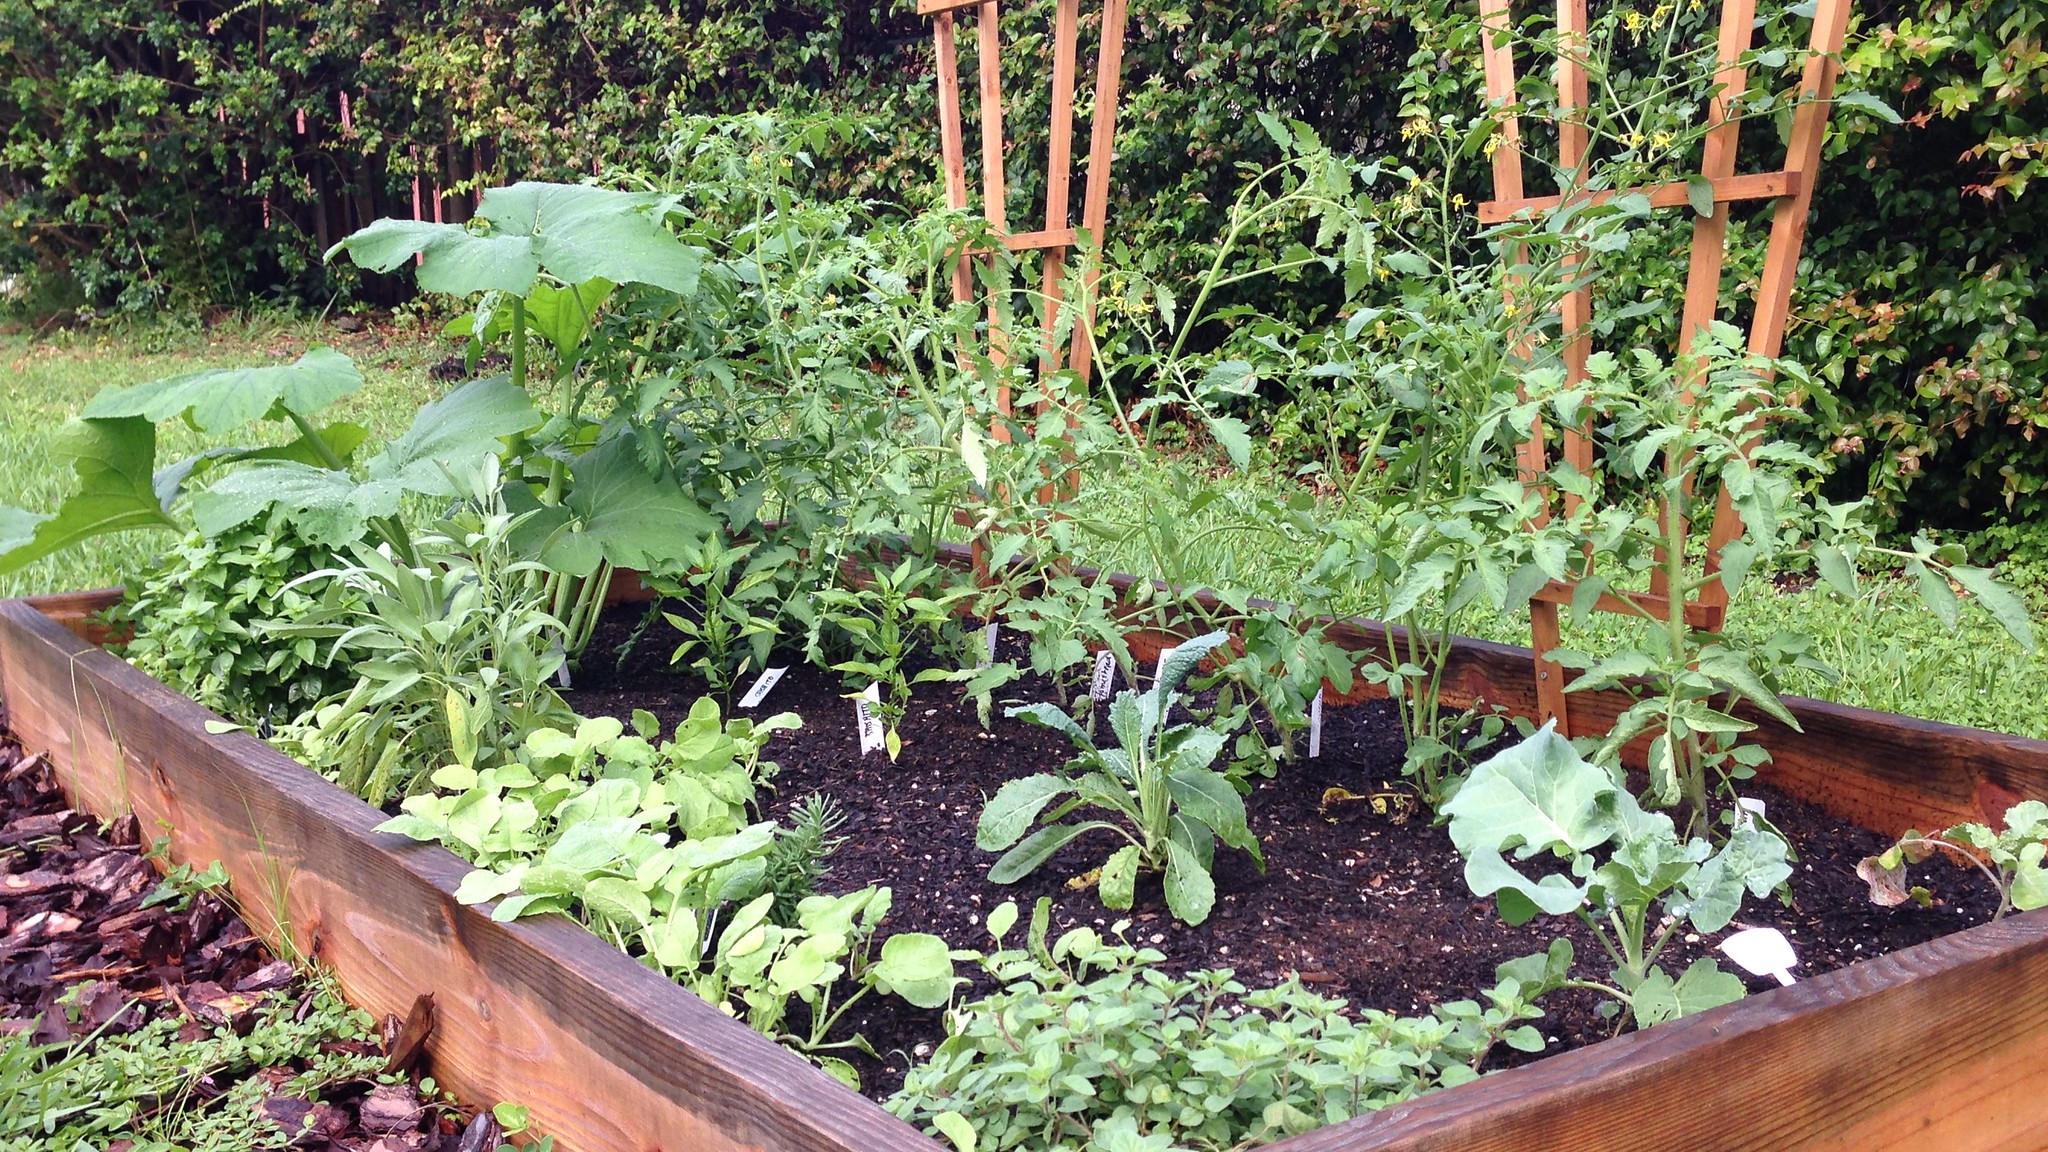
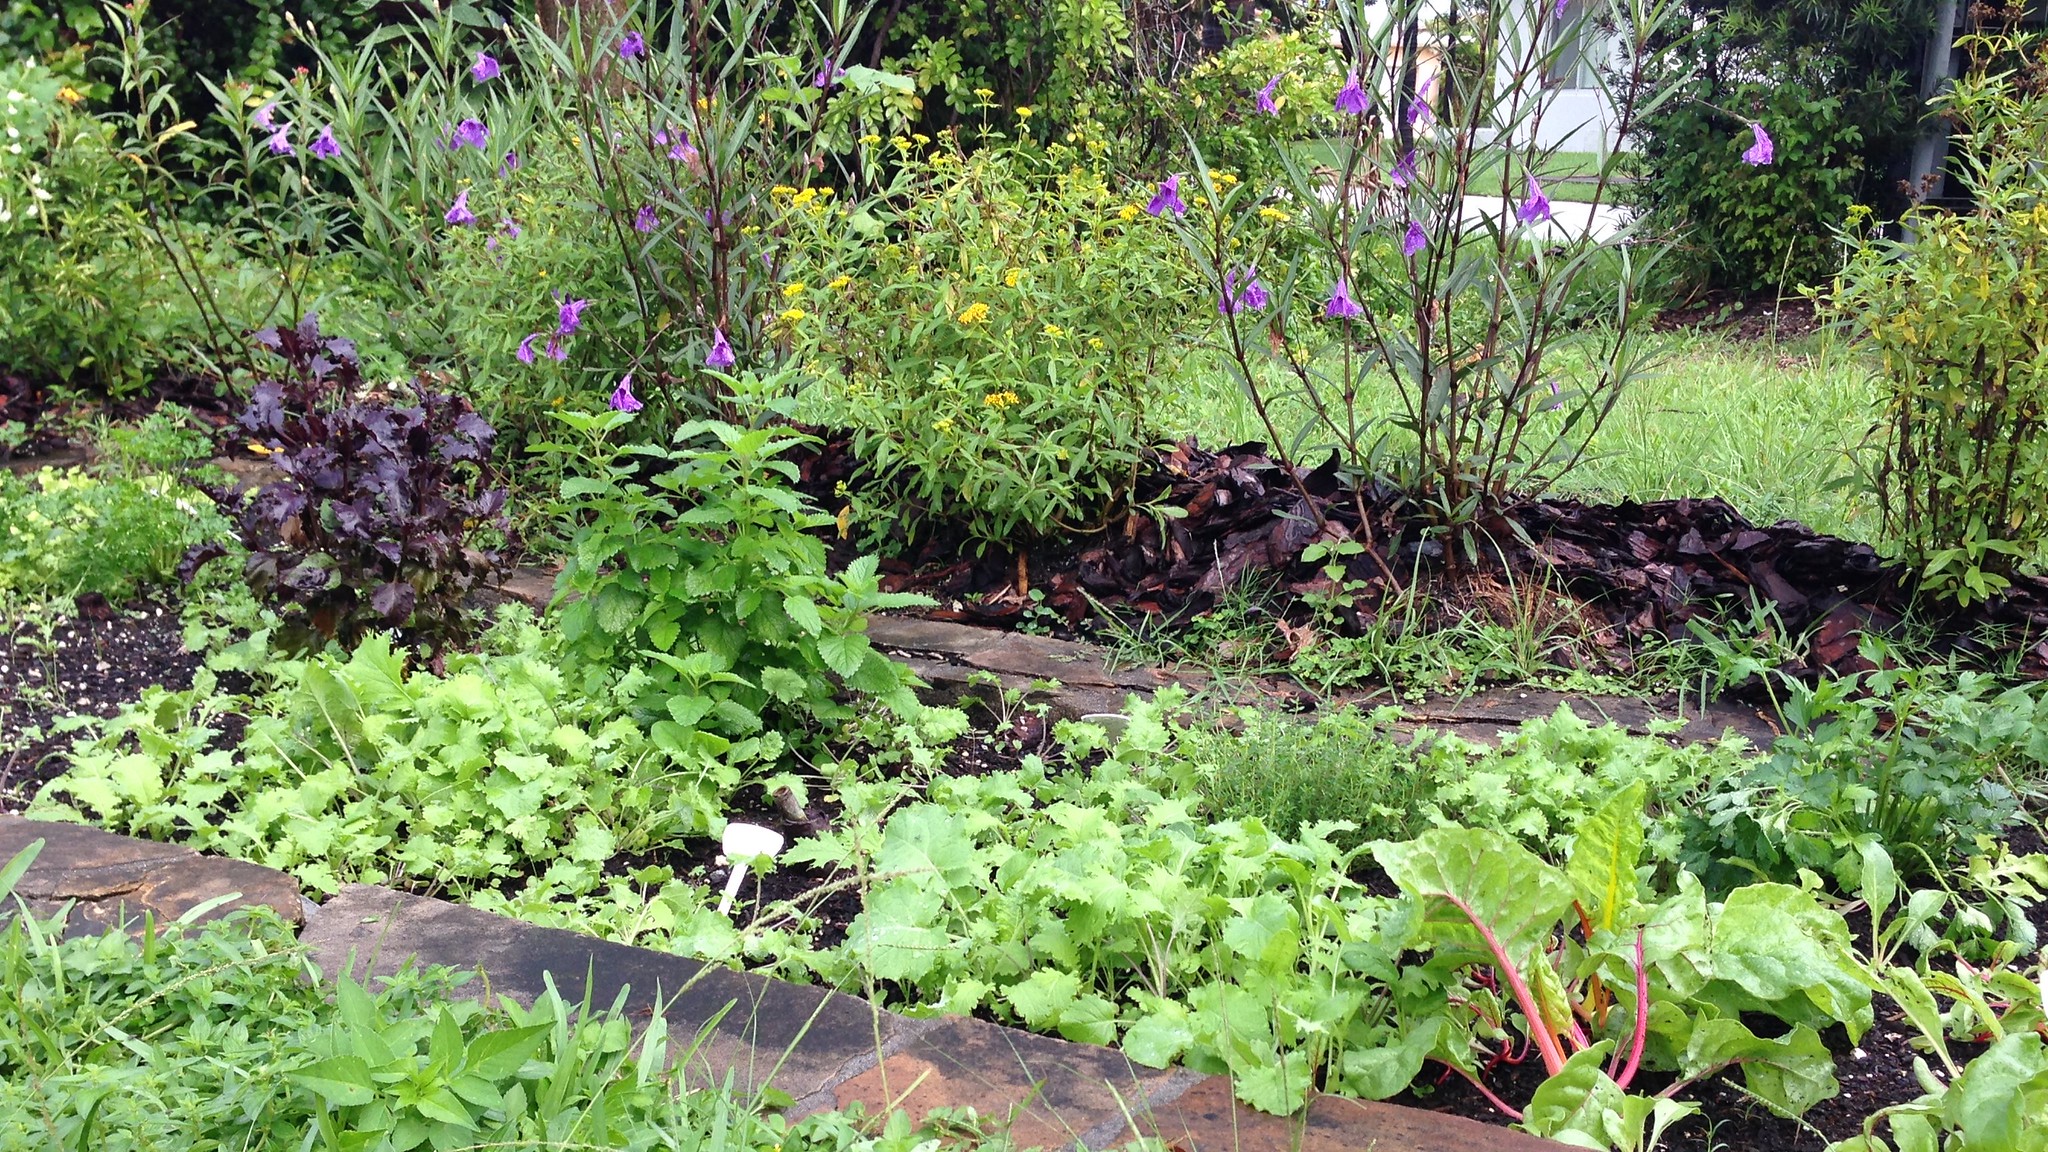
Passover is something of a culinary challenge: the whole prohibition on leavened grains can be pretty limiting, especially when it comes to dessert, and there are certain things that are expected: the matzo ball soup, the gefilte fish, the brisket, the tzimmes. I wanted to be respectful of tradition without being completely straitjacketed by it – let’s be honest, some of those old-timey dishes are better than others (for further reading: Charlotte Druckman, “Can You Update a Passover Menu and Still Satisfy Traditionalists?,” which was a source of much of the inspiration for my menu, though not any of the actual dishes). Also, I had a stockpile of CSA vegetables gathering in the refrigerator bin, and at least one vegetarian joining us for dinner.

So here’s what I came up with, and where applicable, where my recipes came from, with a few I made up myself:


(You can see all my pictures in this Passover Home Cooking flickr set).

To Nosh:

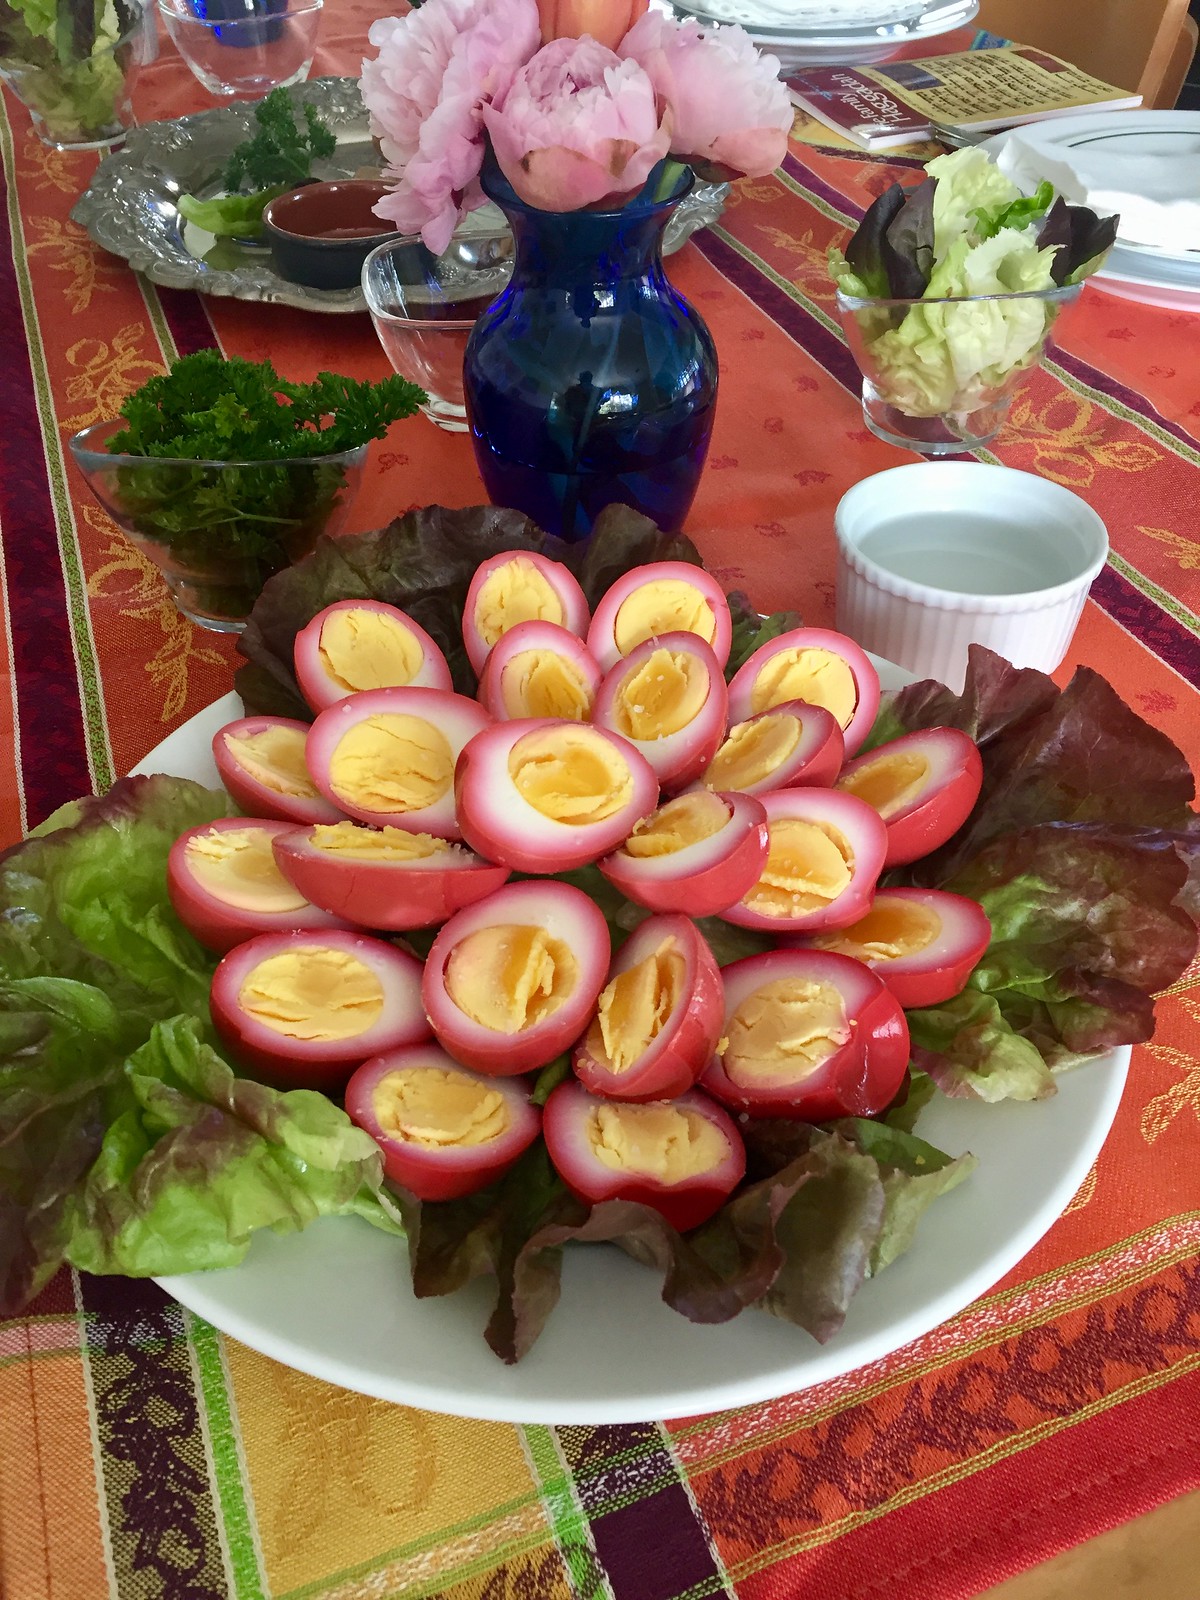
Beet Pickled Eggs - you’ll find a multitude of recipes for these online and elsewhere - my starting point was this Michael Solomonov recipe. I happened to already have a bunch of beet pickling liquid from some fairly ancient brined beets I made using the Bar Tartine recipe,[1] so I used that as my base, diluting it with some water, reinforcing it with some white vinegar, and sweetening it with some sugar. I stuffed a dozen cooled, peeled hard-boiled eggs into a couple big jars and covered them with the beet liquid, then let them sit for two days in the fridge.

I was expecting our crowd to be skeptical of these – actually, I thought I'd be eating leftover pink egg salad sandwiches for the next week – but they were a big hit. The colors – sunny yellow yolk bordered by a ribbon of white fading into magenta exterior – are really striking, and the flavor has just enough pickle-y kick to let you know it’s there without being overwhelming. These are super easy, beautiful, and a crowd-pleaser.

Chopped Liver - when I was growing up, my grandmother – and then my mom – used to serve chopped chicken liver molded into the shape of a bird. Then everyone stopped eating chopped liver, which came to be regarded as deadly. I think it may be getting a bad rap. Yes, chicken livers, like many organ meats, are high in cholesterol, but they’re relatively low in fat and high in nutrients. Yes, you add some schmaltz, but you don’t need a ton. I followed this recipe from Russ & Daughters, subbing duck fat for chicken schmaltz because we were saving our schmaltz for the matzo balls. It says the yield is 8-10 servings, but you can probably comfortably serve this much to a group of twelve because there's going to be four people who don't eat liver. Besides, because it’s so rich and intense, you don’t need to eat all that much – just a couple shmears on some matzo, and you’ll be happy and fortified. I say “Bring Back Chopped Liver!”

Smoked Mackerel Dip - Unlike some people, I actually like gefilte fish, but sorry, I’m not going to make it from scratch. We happened to have some smoked mackerel fillets in a drawer of the fridge, so I figured - why not make a fish dip instead? I only stumbled across Felicity Cloake’s “How to Make the Perfect …” column in The Guardian by googling “smoked mackerel dip,” but appreciated the trial-and-error methodology of trying out multiple recipes and taking the best of each of them. It turned out quite nice, though I perked it up with supplemental additions of fresh horseradish, lemon and dill just before serving.[2]

Traditional:

Matzo Ball Soup - This was Mrs. F’s domain. I tried to pass along helpful tips via Serious Eats for getting your balls to be sinkers or floaters or somewhere in between, but she had no interest. I did well to just leave her alone. Her broth was golden and clear and deeply chicken-y; her matzo balls were just substantial enough to let you feel their presence, but light and fluffy rather than leaden.

Chicken Marbella - Here I thought I was some kind of genius for suggesting we do Chicken Marbella for Passover dinner. Turns out that the Silver Palate Cookbook staple also has a long and well-established history on the Seder table.

Brisket - My mom makes the best brisket. Just saying. One day I'll pass along her secrets.

Not So Traditional:


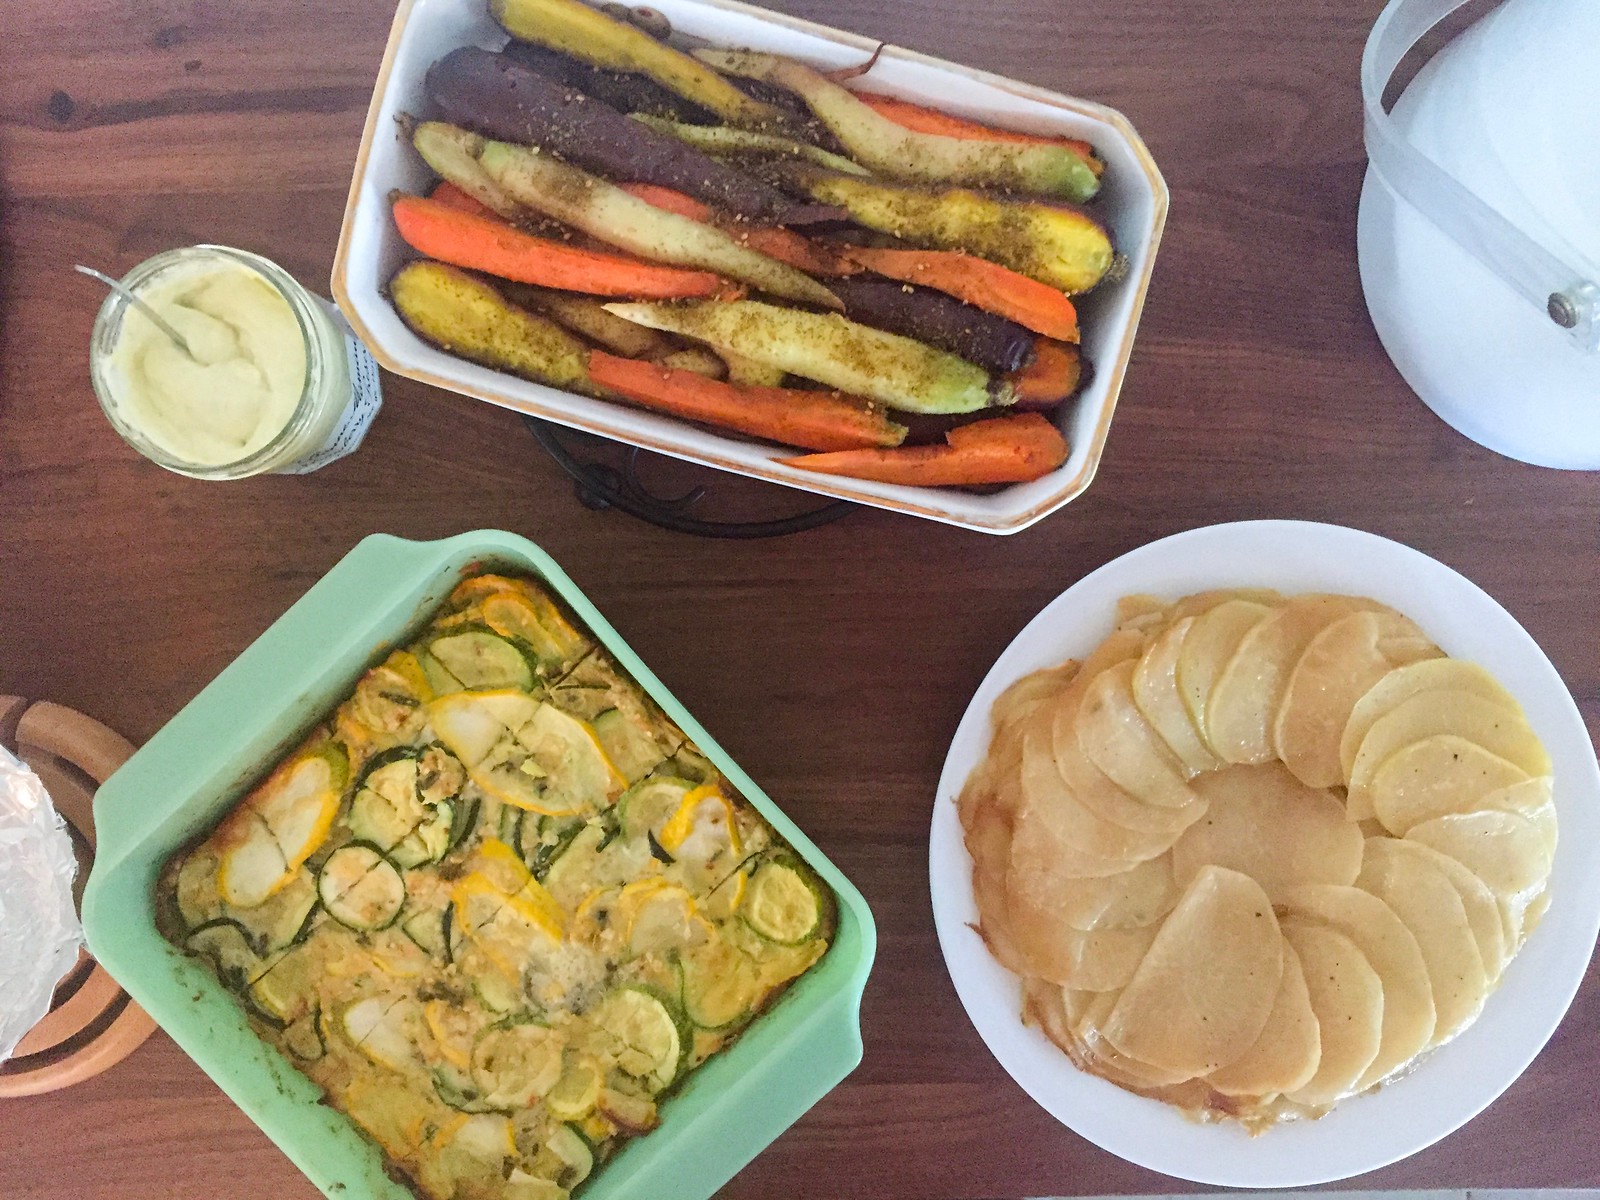
Summer Squash Kugel - I’d accumulated an assortment of zucchini and summer squashes from CSA the past couple weeks, which nobody else in my family will eat. So I figured, I may as well unload them on my guests. But how? I hatched my plan: a kugel.

Kugels are usually stodgy, dense side dishes of potato or noodles bound with egg. The traditional style is pretty heavy and, let's be honest here, pretty bland. But maybe they didn’t have to be that way. Via the almighty google, I found inspiration in this Spring Zucchini Kugel recipe. The result was exactly what I was looking for: lots of layers of vegetables, bound but not weighted down by the eggs – almost like a very veg-intensive frittata or strata. And the lemon zest and mint really brighten up the flavors. Here’s how I did it:

Recipe:
4 lbs zucchini, summer squash or both
2 tbsp olive oil
4 eggs
½ cup matzo meal
1 tbsp lemon zest
2 tbsp mint, chiffonade
Salt and pepper to taste

Preheat oven to 400°.
Thinly slice the squash crosswise (a mandolin might be too thin, you want them to have just a little substance), toss in a large bowl with 1 tbsp olive oil and salt, and then lay out in a single layer on a sheet pan and roast at 400° for about 5-10 minutes. I didn't want to brown them so much as just to soften them and get some of the liquid out. You might need to use multiple sheet pans or do them in batches; a Silpat comes in handy. Remove to a colander and let them drain any additional moisture.
Reduce oven to 350°.
Crack the eggs into a large mixing bowl and stir until the white and yolk are blended. Add the cooked squash, sprinkle in ½ cup matzo meal, lemon zest, mint, and a good pinch of salt, and gently stir to blend (hands probably work best).
Coat the bottom and sides of a baking dish with the remaining olive oil, then gently dump the contents of the mixing bowl into the baking dish. Try to arrange the squash slices so they are laying flat rather than pointing up (most seem to settle into the right position on their own, and in any event, precision is not essential).
Bake at 350° for about 45-60 minutes, until browned on top and cooked through. Can be made in advance and reheated.


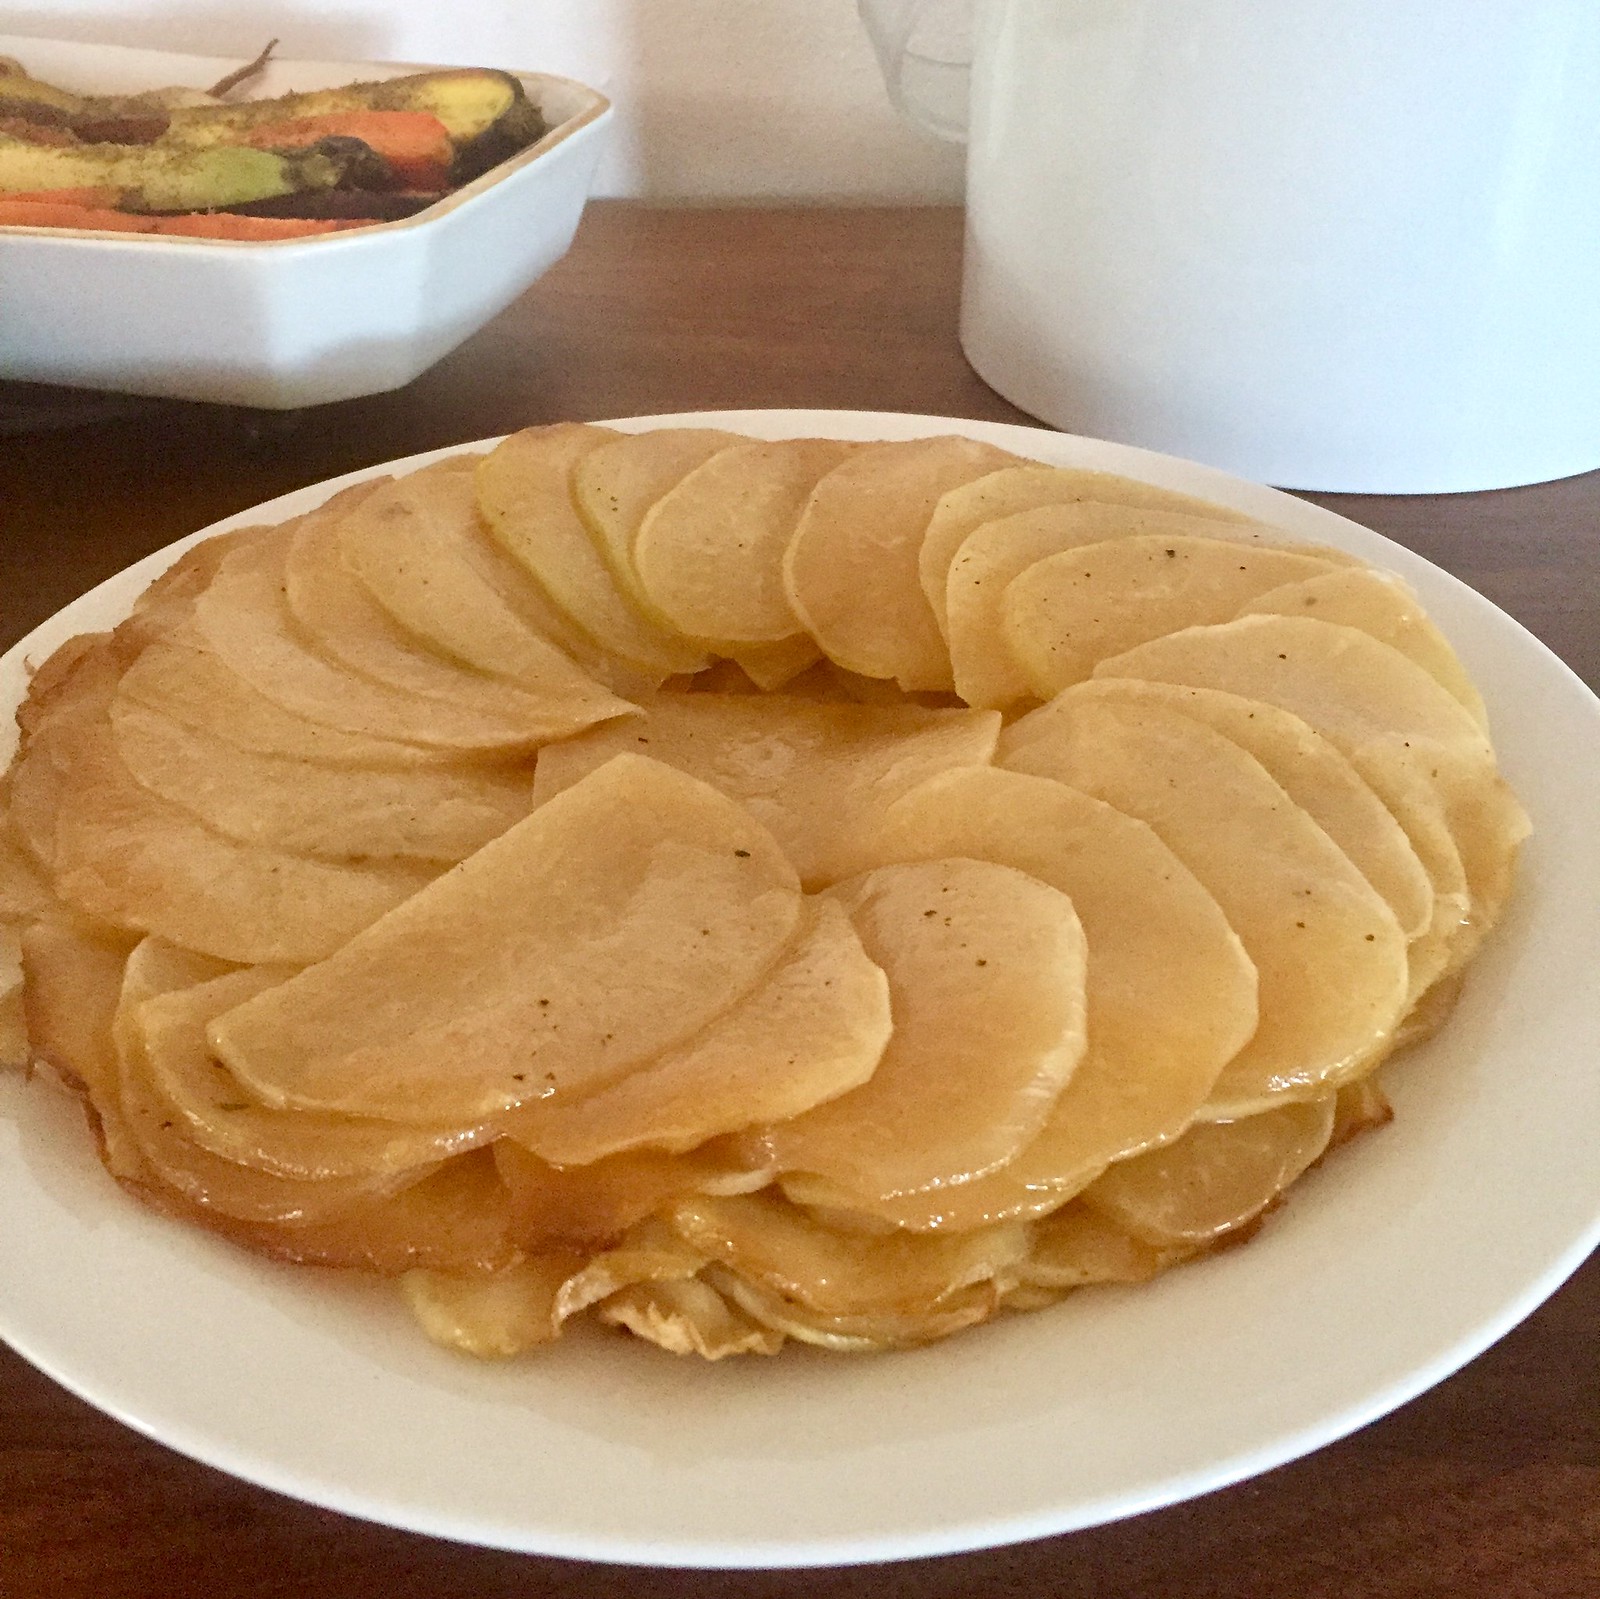
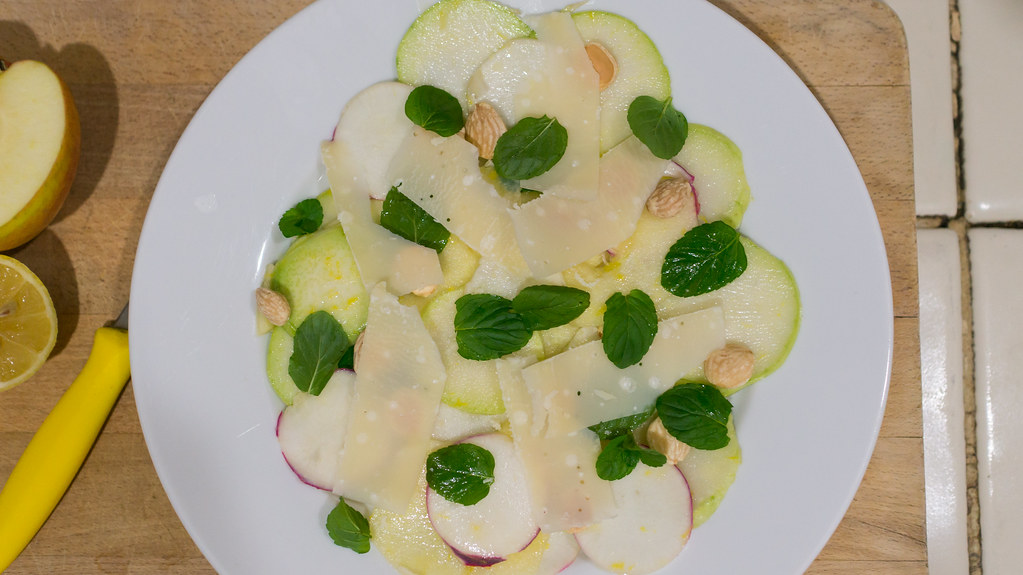
Kohlrabi Anna - Kohlrabi is arguably an even bigger CSA challenge than a load of zucchini. I actually love the odd vegetable, which looks kind of like an alien turnip, and tastes a lot like broccoli stems, but it can be a tough sell. I had an idea: Kohlrabi Anna. The classic Potatoes Anna involves thinly sliced potatoes layered with lots of butter and cooked in a pan until the outer surface is browned and crisp, and the potatoes are tender. I basically did the same thing, but with kohlrabi. I would have liked to have gotten a little more browning – I may have been too timid with the heat – but I really liked how this came out, the kohlrabi tender and nutty and sweet and suffused with butter. This also can be made ahead and reheated though it may lose whatever crunch it may have had.

Recipe:
4 kohlrabi
3 tbsp unsalted butter
2 tbsp fresh thyme
Salt

Preheat oven to 375°.
Peel and thinly slice the kohlrabi into rounds.
Melt 1 tbsp of butter and toss the kohlrabi with the butter, salt and 1 tbsp of thyme.
Rub bottom and sides of a 10" cast iron skillet with 1 tbsp butter.
Arrange kohlrabi slices in circles around the bottom of the skillet, shingling them and overlapping the edges. Dot each layer with butter, sprinkle with salt, and continue layering kohlrabi slices until they're all used up.
Put the skillet on a medium-high heat burner on the stove for 10-20 minutes to brown the bottom. Then move skillet to the oven and cook for another 30-40 minutes, until kohlrabi are tender.
Remove from oven, and when feeling sufficiently bold, put a plate or cutting board over the top of the skillet, then flip the plate/cutting board and skillet – the kohlrabi should come out in one piece, like a cake.[3] Garnish with more fresh thyme, cut into wedges, and serve.

Roasted Carrots with Za’atar and Green Harissa Aioli - Charlotte Druckman is right: tsimis is totally broken. Tsimis, or tzimmes, or tsimmes, no matter how you spell it, is usually pretty gross – an insipid, cloyingly sweet stew of carrots and dried fruit, often supplemented with other sugary vegetables like yams. There's no contrast in flavor (just sort of generically sweet) or texture (just sort of generically soft). I don't think anyone actually likes tzimmes.[4] I was not going to make a tzimmes.

Instead, I took a few different varieties of CSA carrots, halved the fat ones, tossed with some olive oil and salt, and roasted them (400° for about 20-30 minutes, until the biggest ones were just barely fork tender), then sprinkled them with za'atar spice, and served them with a green harissa aioli.

My inspiration came from the fact that dessert involved a meringue, and I had a whole bunch of egg yolks left over.[5] I saved one of them for a favorite kitchen trick: immersion blender aioli. The recipe I've linked to is on Serious Eats, but the first time I saw this done, it was by José Andrés. Kenji uses the stick blender for half the oil (the canola portion), and then blends the olive oil in by hand. This seems unnecessary to me – I dumped it in all at once, and it came out just lovely. For some real excitement, make it right in a jam jar that's barely large enough for all the ingredients. If you start with the immersion blender at the bottom of the jar, and slowly, gently move your way up, it perfectly emulsifies all the oil without any splatters, and no need to decant into another container.

Once the aioli is made, just stir in prepared green harissa – or any other flavoring you like – to taste. I used a couple tablespoons of this Mina Green Harissa, which I like quite a bit. I also cut back to just three garlic cloves in the aioli recipe, as I didn't want the garlic to be dominant. Not to set the bar too low, but this was better than tzimmes.

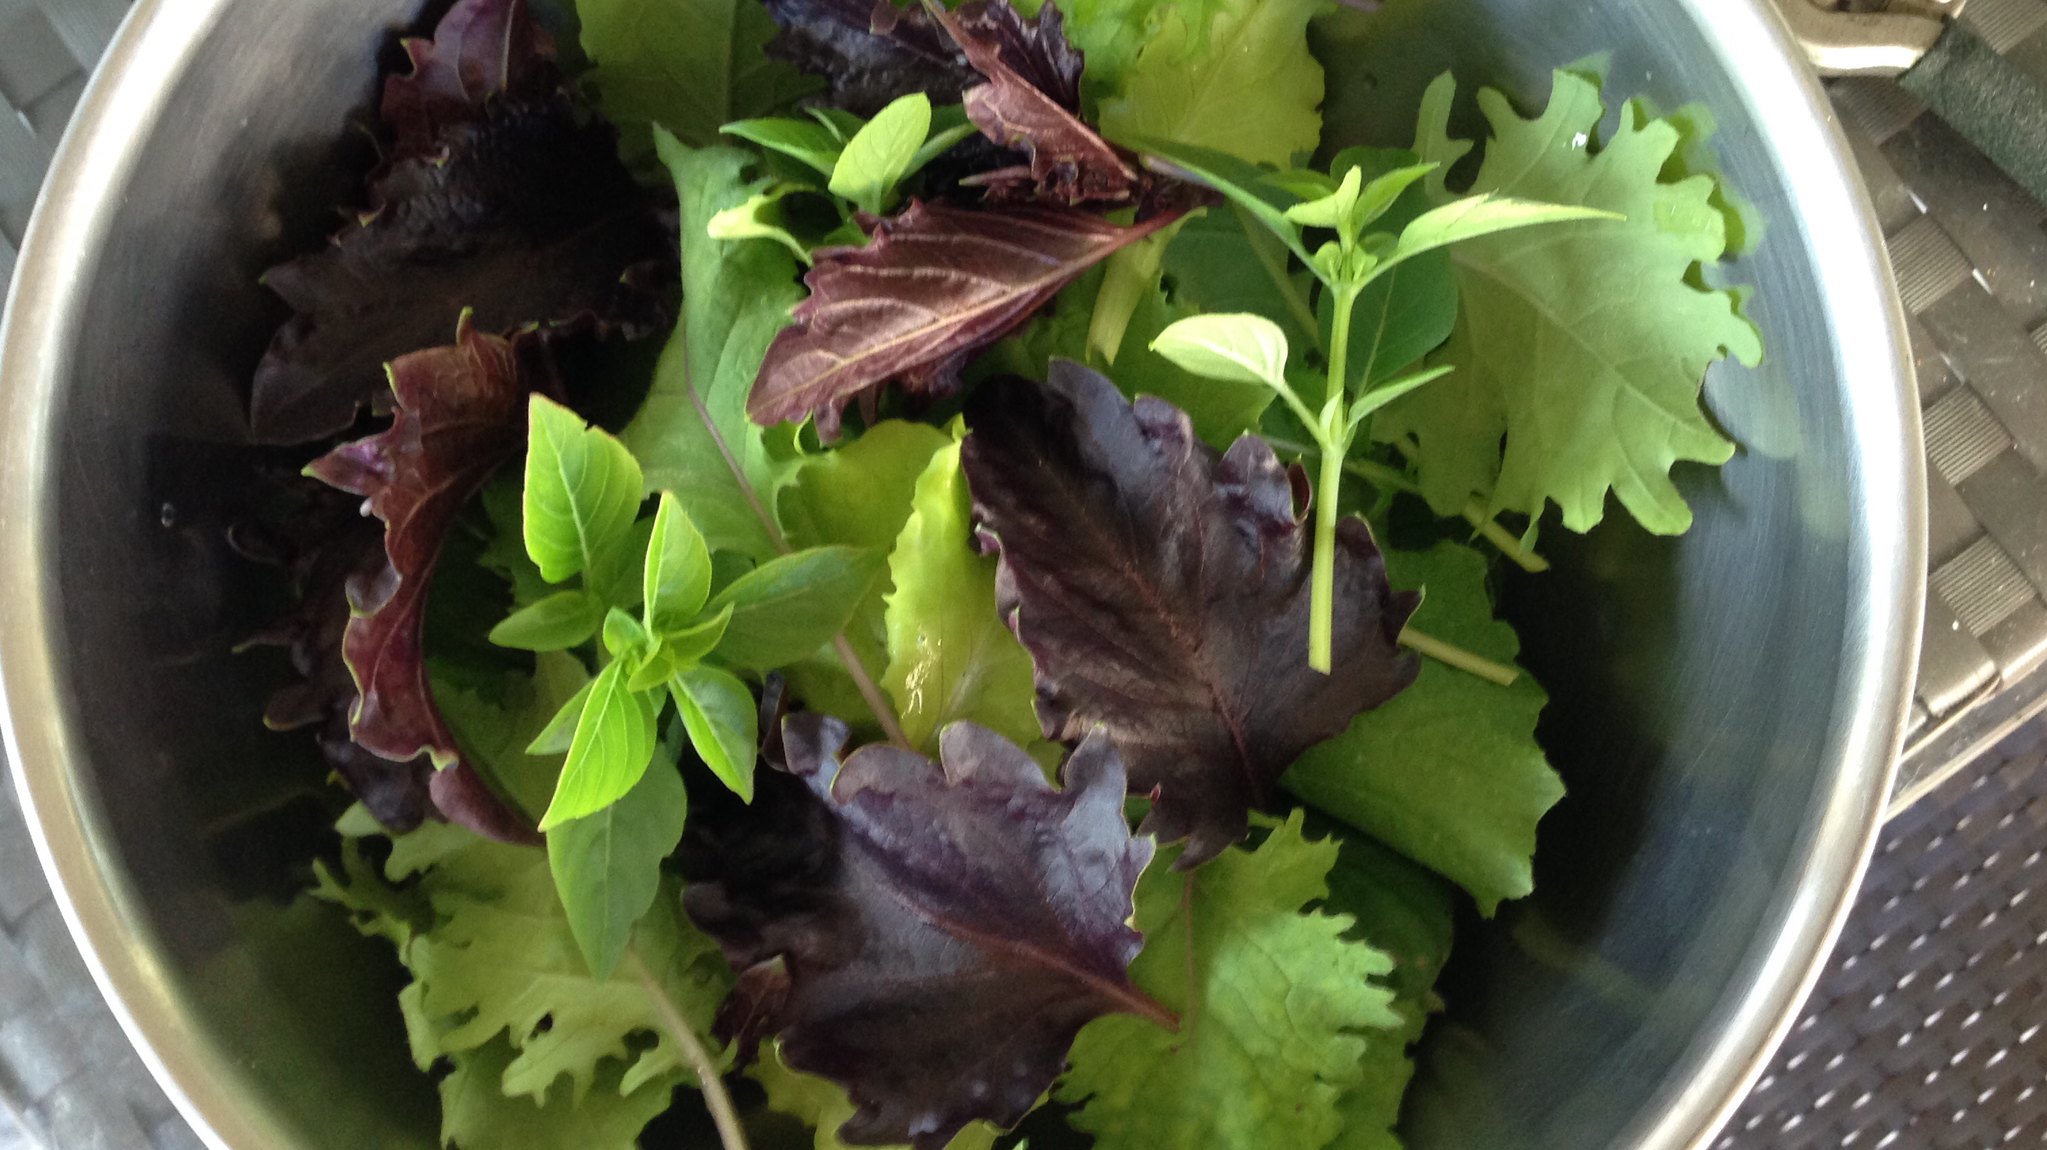
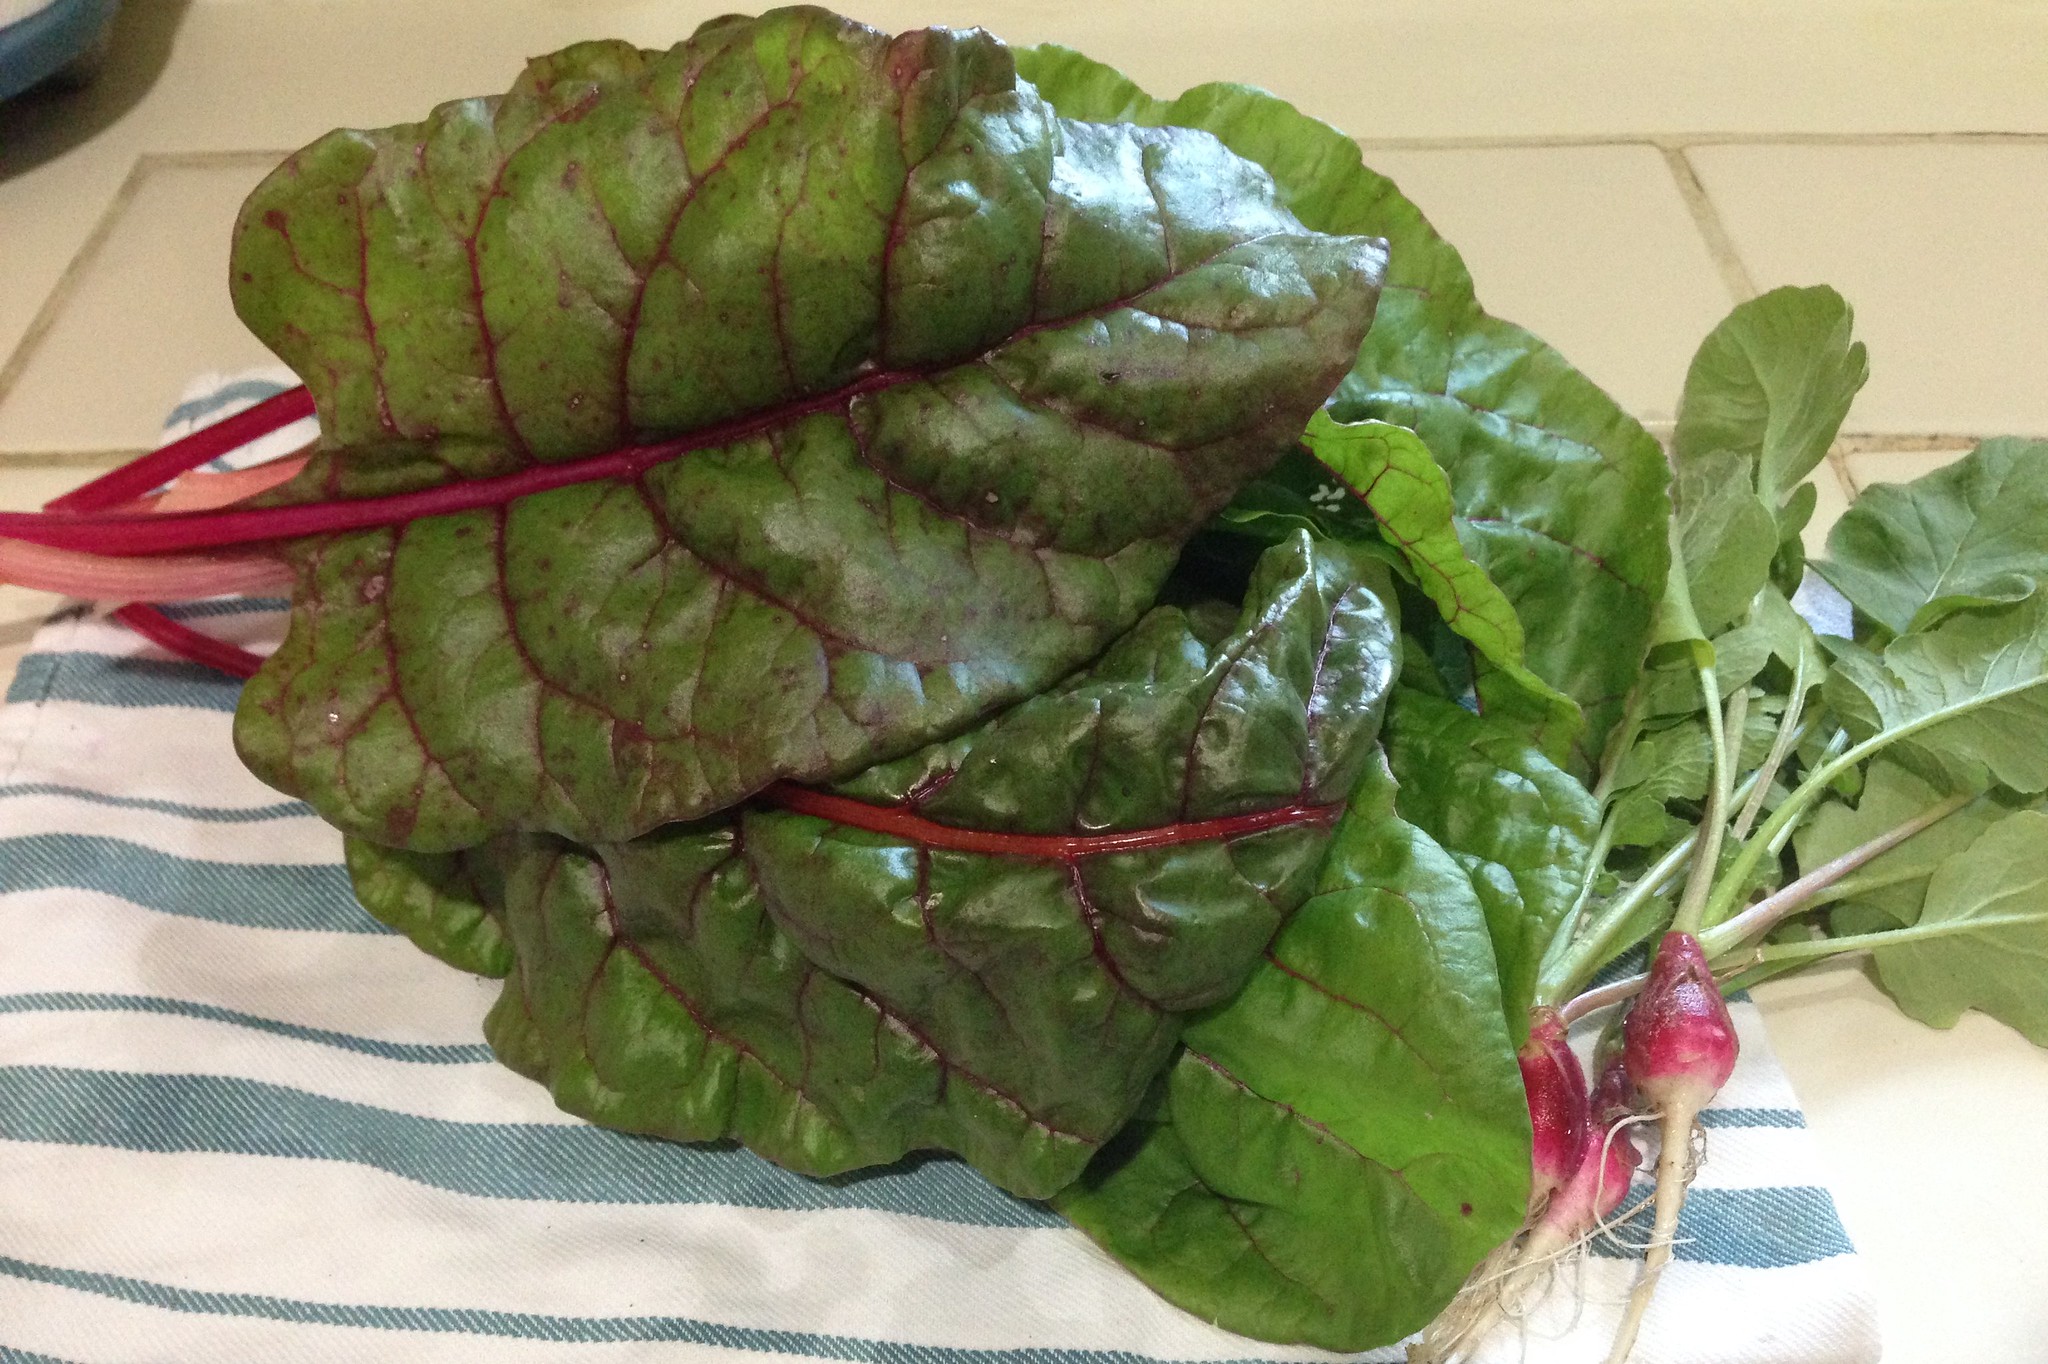
Bitter Greens with Horseradish Ranch - the traditional Seder plate includes bitter herbs – maror and chazeret – for which we now customarily use horseradish and romaine lettuce, respectively. I started thinking about how I could incorporate these flavors into a dish, and while staring at the latest bag of lettuces from my CSA, decided on a bitter greens salad with horseradish ranch dressing. Crunchy, peppery fresh radishes also seemed thematically appropriate. This is my go-to formula for a creamy salad dressing, which welcomes all manner of variations – different herbs, finely chopped chile peppers, a dash of hot sauce, some mashed avocado. No doubt it's a common formula, but I think I arrived at it by way of Andrew Carmellini's buttermilk dressing recipe in "American Flavor."

Recipe:
2 tbsp white wine vinegar
2 tbsp grated fresh horseradish
2 garlic cloves, minced
½ cup buttermilk
½ cup plain Greek yogurt
½ cup mayonnaise
2 tbsp Fresh dill, chopped
Juice of 1 lemon
Salt, to taste
1 big bag mixed salad greens, washed and dried
1 watermelon radish, thinly sliced
3 breakfast radishes, thinly sliced
3 hakurei turnips, thinly sliced

Add vinegar to mixing bowl. Add horseradish and garlic and steep for 5-30 minutes. Add buttermilk, yogurt, mayo, dill and stir until combined. Add lemon juice and salt to taste. Add radishes and turnips to salad greens,[6] and toss with dressing.

Dessert:


Walnut Chocolate Dacquoise - I am not a baker. Dessert is generally the least exciting part of a meal for me, and I'm even less enthusiastic about making them. But I've been watching lots of Great British Baking Show on Netflix lately, and it's boosted my confidence a bit. And besides, Passover desserts are already pretty terrible (no leavened flour), so how badly could I do?

For whatever reason, meringue is a little easier for me to wrap my head around than most desserts, so I settled on this variation on a dacquoise. We had a big bag of walnuts in the house, and Mrs. F likes walnuts, so I substituted them for the hazelnuts. It was actually pretty easy: toast and chop the nuts, whip the egg whites to soft peaks, add sugar and whip to stiff peaks, mix in vanilla and almond extracts, then fold in the chopped nuts, chocolate chips, and melted chocolate. Then you spread the mixture out into three circles on parchment paper[7] – as far as I'm concerned, they don't need to look perfect – and bake at 225° for 2 1/2 hours, then let them cool and dry out in the oven.

When you're ready for assembly, whip three cups of heavy cream with 1/4 cup confectioner's sugar until you have whipped cream; then spread a layer of whipped cream over one of the meringues, top with a second meringue, repeat, top with the third meringue, and repeat once more. I then stuck it in the freezer overnight, sliced it straight out of the freezer (some bits will break off; save the crumbs), then moved it to the fridge the morning of Seder dinner. Before serving, I sprinkled the top with chocolate shavings, crumbled toasted walnuts, and the pulverized crumbles of meringue that had broken off during slicing.

Folks: it was ridiculously good. The meringue was maybe a bit dense, but it had a good crunch and crumble, the flavor of the walnut and chocolate carried through, the whipped cream was an airy, fluffy contrast, and even if it kind of looks like it's falling apart around the edges, it sliced very nicely to show the alternating layers of meringue and cream. I may be stuck with Passover dessert duty now.


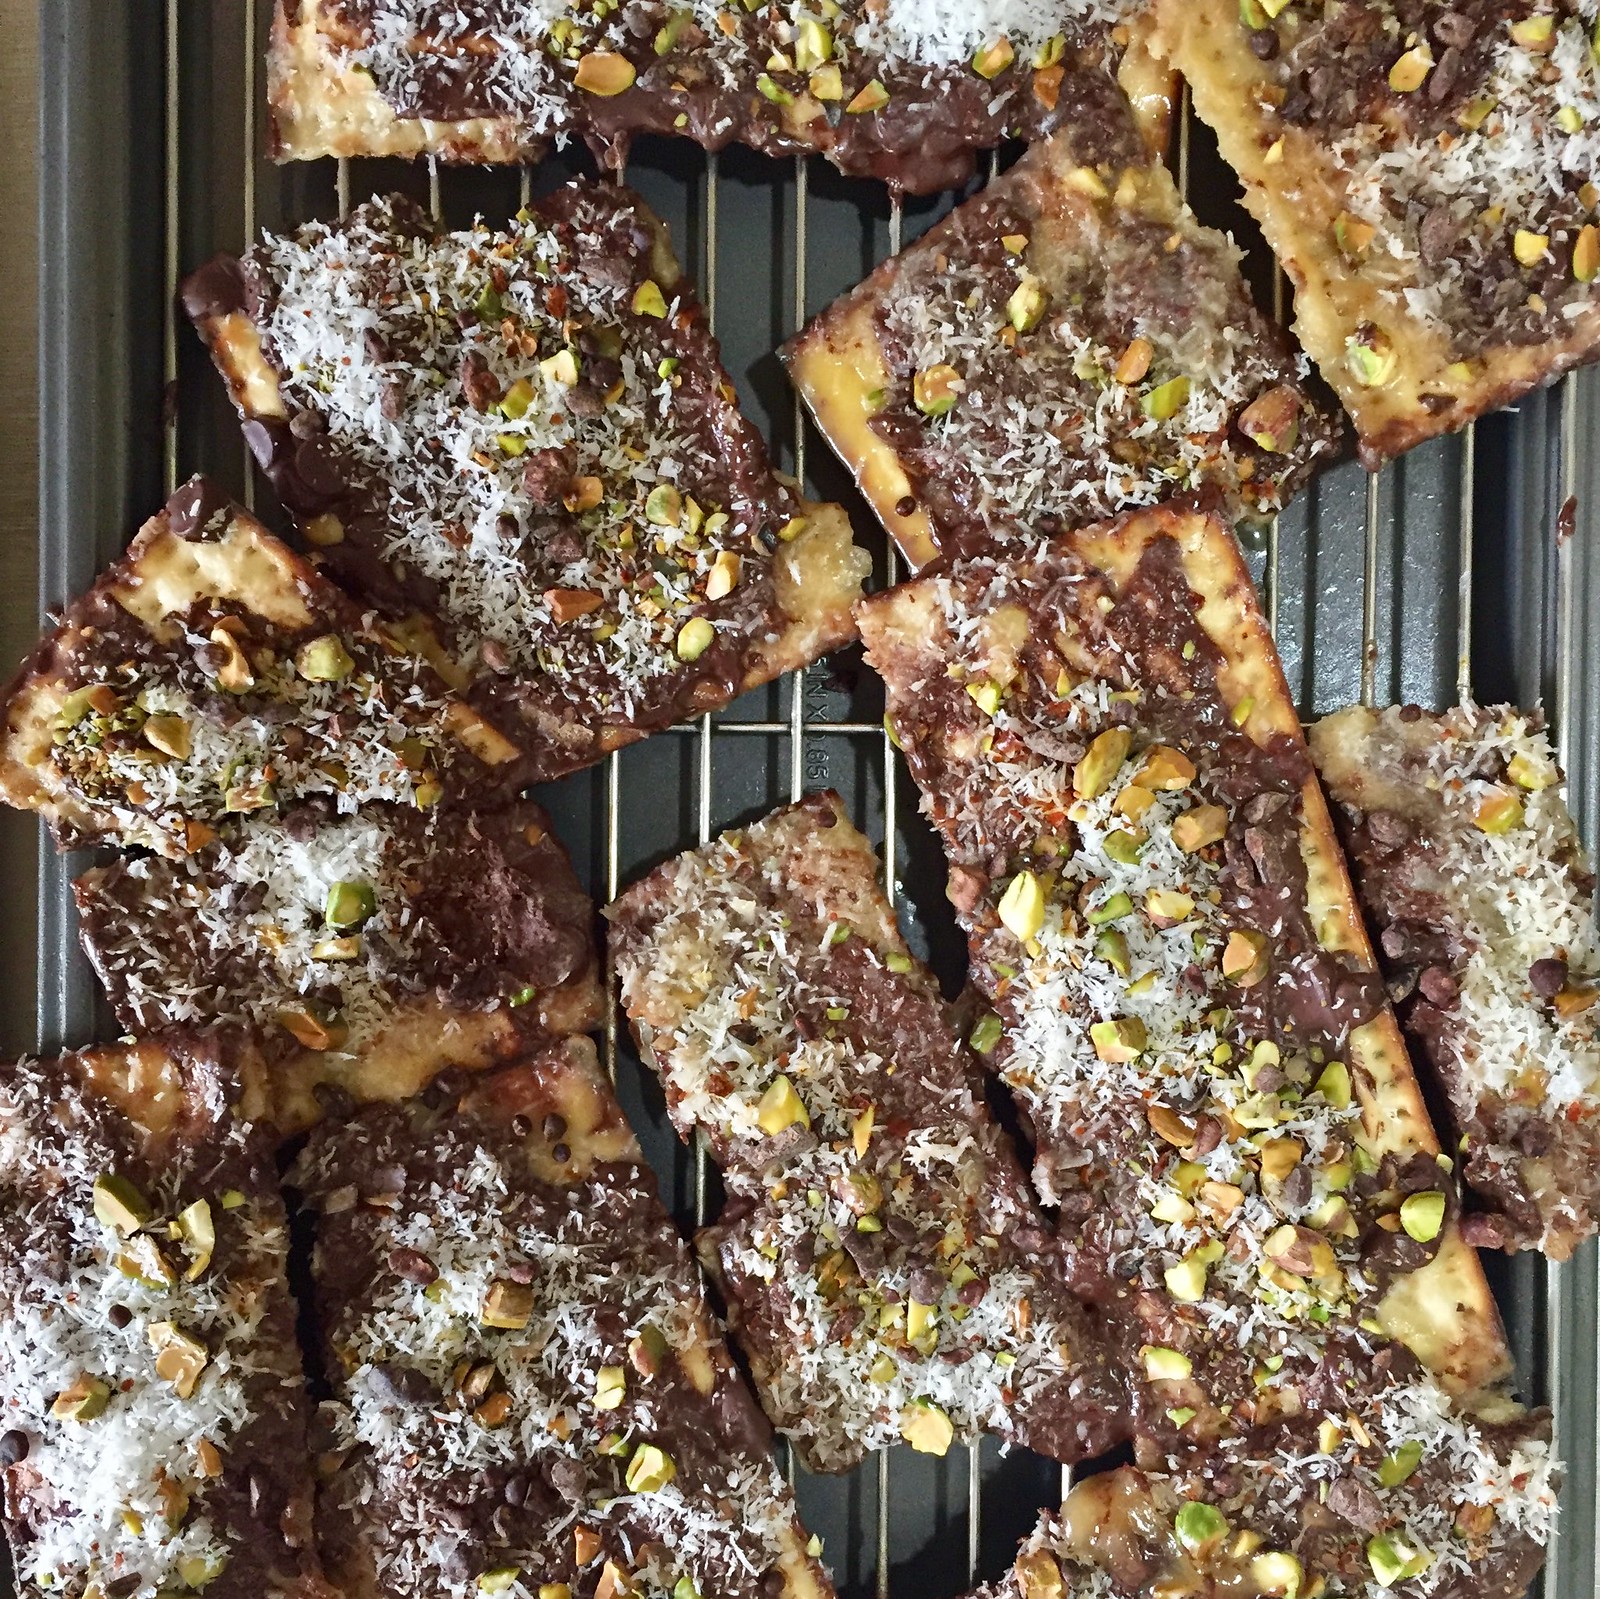
Chocolate Toffee Matzo - this was a recipe I pulled from Bon Appetit, and accomplishes the unique feat of making matzo actually taste good (though of course it's not the matzo, its' everything you put on top of it). The idea is you make a toffee from butter and sugar (with a pinch of Aleppo pepper), spread that on the matzo, bake it for about 10 minutes, then melt chocolate over the top in the residual heat, spread the chocolate, and sprinkle with pistachios, coconut flakes, cocoa nibs, flaky salt, and more Aleppo pepper. Great flavors here; the toffee component left something to be desired – whether because the instructions are flawed (I don't think a "simmer" gets the toffee thick enough) or my own failed execution, the toffee wasn't spreadable, and wound up more like a soak in a hot, sweet melted butter bath for the matzo. Sticking it in the freezer after it was fully assembled and cooled helped it firm up.

So we got to share the holiday with family and friends, we got to tell the story of Passover one more time, we drank wine and reclined, we used up a whole bunch of our CSA produce, and we discovered I can actually make a dessert. That was the fun part. Now comes the hard part – not eating bread for a week. Chag Sameach to all my fellow tribespeople, and as for the rest of you: please stop posting pictures of delectable baked goods for the next week.

[1] Oh my gosh - could these have been the same pickled beets I wrote about making two years ago? Maybe.

[2] While this menu is "kosher for Passover," it is not actually "kosher" – we’ve got both meat and milk all over the place at the same time. Hey, we each observe in our own ways.

[3] When you pull it from the oven, give the skillet a little shake to make sure the kohlrabi isn't sticking (if it is, I'm not sure how to help you). If you flip it onto a cutting board (I find this easier than a dish because the cutting board is flat), you can then slide it from the cutting board onto a serving dish.

[4] This is a big part of why Chicken Marbella makes so much sense as part of a Seder: you can offload all that sweet stuff into a meat dish where you at least get some contrast from the olives and capers and herbs.

[5] Pro tip: with the rest of the yolks, make a lemon or other citrus curd (I had blood oranges, and used this recipe as a starting point, but used five yolks instead of the three yolks and three whole eggs called for in the recipe, and cut the sugar back to 1/4 cup); then dollop spoonfuls of the curd on macaroons.

[6] The radishes can be sliced the day before and kept in ice water, they'll remain nice and crisp and this makes last-minute assembly easier.

[7] I actually made a piping bag from a Ziploc with a corner cut off, but my piping was, well, pretty inartful (let's just say I was reminded of walking the dogs) and so I then spread it out into circles using an offset spatula.

Wednesday, December 24, 2014

How Does My Garden Grow?


The primary focus here at FFT has always been restaurant dining – but sporadically I've indulged in missives inspired by my CSA subscription with Little River Cooperative, and even the occasional backyard planter box tomato. This October, we plunged in a bit deeper. As part of a landscaping project at the house, we installed a raised vegetable bed in the backyard, and also filled in a defunct little kidney-shaped "pond" with soil and planted it with greens and herbs.[1]

I make no claim to having a green thumb; indeed, if I don't kill a plant within a month I feel like I've accomplished something. But despite my very limited experience, this little garden has been a source of a disproportionate amount of joy the past few months.

We started at the beginning of October with this:


Today, it looks like this:


(You can see all my garden pictures in this flickr set.)

I've been giving something of a weekly play-by-play on Twitter and Instagram, but if you've not been following along there, here's a rough recap of the past few months for Farmer Frod.

The raised bed started with a couple tomato plants, some herbs (mint, basil, sage, lavender, oregano), a couple broccoli plants, and was seeded with radishes and carrots. A couple weeks later I supplemented these with a few more tomatoes (Sungold, Black Krim, Purple Russian, Homestead, and Gold Medal) a zucchini plant (romanesco costata, to be precise), a Tuscan kale, a couple shishito peppers, and a jalapeño, all bought from Little River, The other bed also started with some herbs (chocolate mint, opal basil, a couple different parsleys, tarragon, thyme), a few Swiss chard plants, and was seeded with lettuces, kale and mustard greens.


To give you a good idea of just how much of a novice I am: when these little seedlings started sprouting up a few days later, I called my landscaper in a panic, having no clue whether they were vegetables or weeds.


The radishes and greens came in incredibly quickly, and in a month some were ready to harvest.

(continued ...)

Wednesday, July 23, 2014

Big Things at Little River CSA


For the past few years I've subscribed to a CSA (Community Supported Agriculture) vegetable share through Little River Market Garden, and periodically (OK, sporadically) posted about it here. Muriel Olivares operates a flourishing, but small, "urban farm" from a couple lots in residential neighborhoods in North Miami which produce several dozen varieties of vegetables and fruits. Though it's self-evident from the primary subject matter of this blog that I enjoy dining out, I always get excited when our Fall-Spring South Florida growing season kicks in, and the weekly pickup from farmer Muriel inspires a bit more home cooking.


For this upcoming season there are several new developments of note. First off, there's a new name: Little River Cooperative, as Muriel has partnered with former intern Tiffany Noe to run the farm, CSA and nursery. It's even got a sharp looking new website. The partnership will enable them to add more growing space, which is also going to mean more CSA shares will be available.

Speaking of which, there will now be an option to choose a large share or small share ($640/$500 for 20 weeks of vegetables), and in addition to the regular Saturday pick up location at the Upper East Side Farmers Market at Legion Park (Biscayne & 64th Street), there will also be a new Thursday afternoon pick up location further south at the Grove Green Market in Coconut Grove.

I've talked before about the kinds of things that elevate a food community. There may be none more important than farmers like Muriel and Tiffany who supply fresh local stuff, produced in a natural, sustainable fashion. Though the season doesn't start for a few more months, now is the time to sign up. To do so, or for some more information, go to the Little River Cooperative website.


Tuesday, February 4, 2014

CSA Weeks 1 through 11 (a/k/a "What Happened to the CSA Posts?")

This is now my third year doing a CSA with Little River Market Garden, and while the quality of the products keeps getting better and better, the frequency of my posting on them has precipitously declined. I managed only two posts all of last season, and here we are halfway through this season, and not a single report yet.

Part of the reason, honestly, is that in our home cooking we mostly sacrifice creativity for simplicity, if not expediency. And while a simple salad or some braised greens may make for good eating, I'm not convinced it makes for exciting reading. Still, it's one of the small highlights of every weekend to pick up my bag of vegetables from Farmer Muriel every Saturday. So here is a glimpse of what I've been doing with it.


Shaved kohlrabi and turnip salad. I think kohlrabi is a vastly underappreciated vegetable. It's got a satisfying snap to its texture and a flavor that reminds of broccoli, but sweeter and less farty. So I was excited to see kohlrabi at Muriel's stand this Saturday,[1] and then even more excited to see a recipe using it from Ignacio Mattos of New York's Estela in the latest edition of Bon Appétit. In fact, it's a dish I had at the restaurant just last month.

This winter salad combines thin-sliced root vegetables (the magazine recipe uses kohlrabi; when I had it at the restaurant, it was with turnip - I used both) and apples, dressed simply with lemon juice, zest, and vinegar, together with fresh mint, nuts (the recipe called for hazelnuts but I had none and used marcona almonds instead) and cheese (I subbed parmesan for the funkier fossa cheese Mattos uses). It's deceptively simple, pretty, and incredibly satisfying: the crunch of the root vegetables, the refreshing tartness of the apples and lemon, the umami from the cheese and nuts, a bright grace note of fresh mint.


Spicy beans and wilted greens. This recipe, with some adaptations, was from last month's Bon Appétit,[2] and brings a motherload of umami via anchovies and parmesan rinds cooked with the beans. We used every green we had in the fridge, which included kale, Swiss chard, turnip greens and kohlrabi greens. Some variation on this theme - greens, beans or a grain, and top it with an egg - is a regular dinner staple in our house.[3]


Backyard tomatoes with burrata, spring onions and arugula. OK, the only thing here that actually came from my weekly CSA share was the onion (and maybe the arugula) - but the tomatoes were from seedlings I bought from Little River at the start of the season. That still counts. I've got about a half-dozen tomato plants going, and the first to bear fruit were the Sungold (a small orange-hued cherry tomato packed with flavor) and the Indigo Rose (almost black-skinned with a bright red interior and a round, sweet flavor). I added one larger grocery store heirloom tomato to bulk this up some. The mint green goddess dressing was inspired by the one served at Ken Oringer and Jamie Bissonette's "Toro Pizzeria" dinner at Harry's Pizzeria last month.

(continued ...)

Sunday, March 31, 2013

CSA Weeks 10-14 and their Uses


So after confessing to my negligence in reporting on the disposition of my CSA shares, I promptly went silent for another month. But sometimes, what else is there to say other than "Look at those tomatoes!"

Well, maybe there's a little bit more to say. Even a recipe of sorts.

One of the dilemmas I've faced in effectively using our CSA share is that sometimes we get a plethora of some items, and for others there's not enough to go around. For weeks we'd been bullish on cutting celery, whereas one head of fennel won't go very far. How to address this imbalance? Make soup.


I took a fat bunch of cutting celery (which is more leaf than stalk, but has a stronger, more focused flavor than the customary type), a head of fennel, a handful of spring onions, and roughly chopped and sautéed them in some butter. To add some body I also threw in some jicama that had been hanging around since Week 11. My thinking is that I wanted something in the family of a vichysoisse, but that wouldn't taste or feel too heavy. After the vegetables had softened some, I added a generous dash of celery seeds, and about 8 cups of water to simmer for about 45 minutes.

Then I puréed it in a blender in batches, cooled it in the fridge, salted to taste, and added some plain Greek yogurt to give it a bit of richness and tang. Served it cold with an extra dollop of  yogurt, garnished with a nasturtium leaf and petal (also from the CSA), and - this really did the trick - a generous sprinkle of yuzu shichimi, which played well with the floral, peppery nasturtium and brightened all the other flavors.

Some people actively hate celery, while most others just don't really see the point. I actually like the stuff. I don't think this soup will make any converts out of the haters or even the agnostics, but if you actually enjoy that pointed beam of clean, green, vegetal celery flavor, you may find some pleasure in this soup.


Tuesday, February 12, 2013

CSA Week 9 and its Uses


I have been seriously derelict in reporting on my CSA garden shares from Little River Market Garden this season. There are no excuses: my farmer, Muriel Olivares, somehow managed to keep things going even while giving birth to a beautiful baby girl right smack in the middle of the season. And she's even added more variety to this season's harvest, including new items like edamame and fresh ginger along with the usual panoply of greens, cabbages, heirloom tomatoes, root vegetables and herbs that we got last year.

So why haven't I done a single CSA post yet this season?


Well, it's partly because when you have tomatoes like these, there is no recipe that can possibly improve on them. You wash them, and then you pop them in your mouth like candy. Maybe halve them and salt them, drizzle them with olive oil if you must. Sure, I could do something more clever than that; but I don't. Even when I cook lately, it's been pretty simple stuff. Assembling a salad or braising some greens does not make for great reading.

Still and yet, I enjoy writing these CSA posts when I get around to doing so, and I especially like giving props to Muriel for the great things she does at Little River Market Garden. So here, then, is what happened to part of the latest garden share:

(continued ...)

Sunday, February 19, 2012

CSA Week 12 and its Uses

CSA Week 12

Last week brought more of these gorgeous, slender, colorful baby eggplants in our CSA shares from Little River Market Garden. Every time we get these I've been meaning to try to duplicate the wood-oven roasted eggplant dish that's often on the menu at Michael's Genuine, and finally got around to it.

grilled eggplant

Lacking a wood-burning oven, instead I salted the eggplants, rubbed them with olive oil, and then grilled them on a cast-iron grill pan. Meanwhile, I warmed some more olive oil in another pan and toasted some pine nuts in the oil, then warmed and plumped some black raisins. I found fresh garbanzo beans at Whole Foods and those (plucked from their pods and blanched for a few minutes in boiling water) also went into the pan. I dolloped the plate with thick Greek yogurt, laid over the pine nuts, raisins and garbanzos along with the grilled eggplant, and then sprinkled everything with smoked salt and ras al hanout.

It may be one of the best things I've ever made from our vegetable shares. Go do this.

(continued ...)

Sunday, February 5, 2012

CSA Week 11 and its Uses

Week 11 "gargouillou"

Just great vegetables. That's what we've been getting from the Little River Market Garden. So I really don't want to do all that much to them. Why not "gargouillou" again?

This week brought yukina savoy, cutting celery, more heirloom tomatoes, and nasturtium flowers; some things from prior weeks were still holding up in the produce drawer of the fridge - multi-color carrots, baby turnips, savoy cabbage, dill. The sturdier stuff (carrots, turnips, savoy stems and leaves, cabbage leaves) got blanched and shocked, others went in raw. A shmear of salsa verde. A pile of finely chopped marcona almonds. A foam of the blanching liquid (emulsified with soy lecithin and frothed with an immersion blender). A sprinkle of Hawaiian red sea salt.

That's all.

Week 11 "gargouillou"


Wednesday, January 25, 2012

CSA Week 9 and its Uses

CSA "gargouillou"

"Gargouillou" apparently was originally a humble French peasant dish of potatoes and ham. But it was made famous by Chef Michel Bras, who reinvented it as a composition of dozens (really - often 50 to 60 separate components) of various fresh seasonal vegetables, herbs, and flowers, painstakingly assembled onto a riotously colorful plate. It has been much talked about and much imitated; chefs the world over have used Bras' gargouillou as the inspiration or springboard for countless dishes, like David Kinch's "Into the Vegetable Garden." You can read about it in this New York Times piece, see a slideshow in this Wall Street Journal, catch it in video form here, or, just do a Google image search for "gargouillou." The pictures are so beautiful you can't help but smile.

So when I picked up my most recent share from Little River Market Garden and saw flowering hon tsai tai, perky Caraflex cabbage, "purple haze" carrots, and wispy fresh dill, among other goodies, a very simple take on gargouillous is what came to mind. The cabbage, hon tsai tai leaves and stems, and carrots were quickly blanched in salted boiling water. Last week's dinosaur kale was tossed with olive oil and oven-roasted till crispy and a bit charred. Last week's cutting celery, this week's dill, and the gorgeous yellow flower buds from the hon tsai tai went in raw. A dollop of last week's marcona almond brown butter vinaigrette, and an herbaceous salsa verde, both found their way onto the plate. I also took the blanching liquid from the vegetables, which had picked up some of their flavors and a nice soft green hue, gave it a bit of viscosity with some agar agar, and drizzled it around the plate.

(continued ...)

Tuesday, January 17, 2012

CSA Weeks 7-8 and its Uses

CSA week 8

The lack of posts on this season's CSA crop should not be seen in any way as a reflection on the degree of my happiness with its supplier, Little River Market Garden. Quite to the contrary, we've been getting a wonderful variety of stuff and have been doing our best to use all of it effectively. Sometimes it's really easy. This week brought a gorgeous assortment of tomatoes, fresh arugula, cutting celery, eggplants, turnips, dinosaur kale, bananas, and a papaya.

Now, I'm not one to "fix myself a salad," but when the vegetables are this fresh, and this tasty, even I yield.

CSA salad

No bacon, no eggs, no croutons - just arugula, tomatoes, cutting celery, slivers of last week's radishes, a drizzle of olive oil, a squeeze of lemon, coarse salt and freshly cracked pepper, and a dollop of creme fraiche to pull everything together. I recognize this is not terribly interesting as a recipe or a dining experience. But it's a testament to the joy of great produce, grown with care, that this was one of the best things I ate all weekend. Those tomatoes are an emotional experience.

grilled carrots

For something just a bit more involved, I would highly recommend this recipe for Grilled Carrots with Brown Butter Vinaigrette, courtesy of Chef Bryce Gilmore of Austin's Barley Swine. The carrots (from last week's CSA pickup) are first marinated in olive oil spiked with pimentón, fennel, coriander, garlic and thyme, then grilled and dressed in a vinaigrette of browned butter blended with marcona almonds and sherry vinegar. There's a lot of subtle brilliance in this recipe: the carrots take well to the spices, the pimentón and grilling bring out a smoky aspect, while the brown butter and marcona almonds highlight the carrots' nutty flavors. I made just a few variations to the published recipe: I left the fennel seeds whole because I like their pop of flavor, I grilled these larger carrots (halved or quartered as appropriate) for closer to 10 minutes than 6 and covered the grill pan with a lid to steam them at the same time, and I added a bit of the remaining spice-infused oil from the marinade into the dressing to reinforce the flavors.

When prepared this way, the firm but yielding texture of the carrots and the smoky flavors actually calls to mind the experience of eating a grilled steak. This could, if you were inclined to such things, make a fine vegetarian entrée, and indeed you could sub olive oil for the brown butter and make it an entirely vegan - and still very satisfying - dish. Now I'm not ready to try the Vegan Experience, like Serious Eats writer J. Kenji Lopez-Alt is doing for the next month, but if I were, there are worse things I can imagine eating.


Tuesday, December 6, 2011

CSA Week 2-3 and its Uses

Uh oh. Only three weeks into the CSA season and I'm already a full week behind in posting. Not an auspicious start. This is no fault of Little River Market Garden, which has been supplying great stuff. Let's see what we can do to get caught up.

CSA Week 2 Share


The Week 2 share brought kale, pei tsai (the unnamed mystery green from Week 1), basil, passionfruit, chinese leeks, long beans, roselle (a/k/a Jamaican hibiscus), and green beans (in the bag).

The basil quickly went into a salsa verde (Italian style, not Mexican), which is good on just about anything and everything: with fish, chicken or beef, tossed with vegetables, dressing a salad, slathered inside a sandwich. The kale and pei tsai hung around the fridge until Week 3 (no picture) arrived with more greens (more kale, radish tops, kohlrabi tops). They all went into a gumbo z'herbes, about which, unfortunately, the less said the better. I was working from the Commander's Palace cookbook, which would seem a decent enough place to start, but wound up with an unappetizing stockpot of swamp bog. I think there was a roux failure somewhere along the way.

A couple experiments that fared better:

"Asian pesto"


The thinking process here went something like this: first, I saw the basil and thought "pesto." Then Mrs. F used up the basil in the salsa verde. Then I saw the long beans and thought of trennette with pesto, which often includes green beans. Then I looked at the Chinese leeks next to the long beans, and thought "Why not an Asian pesto?" The Chinese leeks (much like garlic chives) were chopped, then thrown into the food processor along with some peanuts and enough peanut oil to make a paste. This became a topping for a stir fry of chicken thighs and long beans, the chicken first marinated in soy, garlic, ginger and honey. The chicken, long beans and "pesto" were served over ramen to serve as the pasta element of the dish (I know, chicken has no particular relationship to an Italian pesto, but we had it in the fridge).

The long beans are a favorite of the whole family, including Mrs. F who typically hates green beans. And the "Asian pesto" here provided a nice flavor punch and texture, though the Chinese leeks are pretty pungent raw. We're considering repurposing the rest of the pesto as a dumpling stuffing, and bought some gyoza skins to try it out.

(continued ...)

Thursday, November 24, 2011

CSA Week 1 and its Uses

I started buying vegetables from a CSA two years ago, and set out with the best of intentions to blog the manner of consumption of each week's vegetable share. In year one, that lasted for about six weeks, with sporadic posts thereafter. In year two, I faded after only two weeks. You can observe, and then mock, my feeble output by searching the "CSA" label.

I'm back at it again this year, but with a new supplier. I signed up this season for a CSA with Little River Market Garden, a pocket-sized little farm on a residential lot near Miami's Little River. It's less than five miles away from my house, which somehow seemed more in keeping with the spirit of a CSA. It's nice to be able to pick up right from the farm, instead of a neighborhood drop-off point, to see the stuff growing right there, and to say hi every week to the person growing it (Hi Muriel!).

Little River Market Garden

The season just started this week - yes, South Florida growing seasons are completely inverted, so we'll be getting summer vegetables like zucchini and tomatoes in December - and I picked up our first share from Little River last Saturday.

CSA week 1

Black sapotes, green beans, breakfast radishes, a leafy green whose identity I've already forgotten, roselle leaves (a/k/a Jamaican sorrel a/k/a hibiscus), lemongrass, ripe and unripe papaya, two different kinds of zucchini, oregano, and purple long beans. Not a bad haul.

The thing that I both enjoy, and which drives me to distraction, about doing a CSA is the question that is posed every week: "What the heck am I going to do with this stuff?" Sometimes it's a vegetable I've never cooked before, like these long beans. Or it may be something I don't really get excited over. Zucchini, I'm looking at you.

Now, I don't kid myself - I'm a much better eater than I am a cook. So to the extent I can keep this going longer than two weeks, I'm not promising much in the way of culinary fireworks. But if I can keep it up, then these posts will at least provide a bit of a window into our wacky, upside-down growing season here in South Florida, and maybe even a tiny bit of inspiration too.

(continued ...)

Monday, December 13, 2010

CSA Week 2 and its Uses - Yuca Latkes with Spherified Hibiscus Caviar

So it turns out that a two-part series on homemade kimchi is not nearly as popular as writing about where to eat during Art Basel week. This does not come as a surprise to me. And yet here I am, persisting in writing about my humble efforts to dispose of my weekly CSA share yet again. (If the truth must be known, I'm also still only on Round 1 of my visits to several of the new places to open recently in Miami - including DB Bistro Moderne, Vino e Olio, Wynwood Kitchen & Bar - and am filibustering some here).

Week 2 brought an unusual assortment of goodies: yuca, roselle (a/k/a hibiscus or Jamaican sorrel), lemongrass, callaloo, green onions, eggplant, avocado. Once again, I set out to come up with a dish that would use up at least a few of the components at once. What I wound up with was a very unorthodox latke:

yuca cake w hibiscus caviar

What exactly is that? Well, it will require some explanation.

The roselle and lemongrass were the starting point, as I steeped them along with some fresh ginger to make a tea (which is exactly what I did with the roselle last year). OK, now what? Well, one of the things I'd hoped for in doing this was that the CSA would be an inspration to do more playing around in the kitchen, including with techniques that I've eaten but not necessarily cooked before (like last year's Adrià-inspired canistel microwave cake). So it was time to bring out the "chemistry set."

sodium alginate

Plus, it was Hannukah, so I was thinking of latkes, only maybe using that yuca instead of the traditional potato pancake. And then, what's good on top of a latke? Well, applesauce and sour cream. But also, caviar. So why not make some caviar out of that tea I just made, and then put it on top of a yuca latke? The hibiscus/lemongrass tea has some tartness and fruitiness like applesauce, right?

I'm not saying these are all good ideas. I'm just explaining the thought process.

(continued ...)

Friday, December 10, 2010

CSA Week 1 and its Uses - Part II

OK, so I've got some home-made kimchi that's been getting funky in the fridge for a few days. And I've decided that its mission in life is to ultimately become kimchi ramen. So far so good - except we need a lot more fixings for that ramen. Since I started with the Momofuku kimchi recipe, I decided to plow on ahead and make a version of the Momofuku ramen, and add some kimchi for extra punch. There would be some compromises along the way - no, I'm not making my own noodles,  and I can't easily source my own pork belly - but I was pretty happy with the end result.

kimchi ramen mise en place
the mise en place
First, a broth. The Momofuku ramen broth recipe is sort of a case study in building rich, meaty flavor: kombu, dried shiitakes, pork bones, bacon all get into the mix. It's also a long-term time commitment, needing about 8+ hours of simmering. It's worth it.

You start like a basic dashi, by putting a rinsed piece of kombu in a pot with water (3 qts.),[*] bringing it to a simmer and then steeping it for 10 minutes, then removing the kombu. The next step in the recipe is to add dried shiitakes, of which I had none, so I skipped that, and instead added chicken wings (2 lbs.)[**] and simmered for another hour. Meanwhile, turn the oven to 400º and roast some pork bones (~3 lbs.; I found neck bones at Publix that were perfect for the job) for an hour and a half, turning them after an hour to brown all over. Skim any froth or scum that rises to the top of the stock every once in a while.

I took the chicken out of the pot and added the pork bones, along with 1/2 lb. of bacon. I would have loved to have used Benton's bacon like David Chang recommends, but if I had Benton's bacon I'd be cooking it and eating it out of hand till it was all gone. Keep the broth simmering, and remove the bacon after 45 minutes, then let it simmer for another 6-7 hours. Yup. 6-7 hours. Up until the last hour of cooking, keep adding water if necessary to keep the bones covered. For the last 45 minutes, add scallions (1 bunch, roughly chopped), carrot (1, roughly chopped) and an onion (cut in half). Here's a handy trick: instead of leaving the stockpot on the stove and risking setting my house on fire if I left it, I put it in the oven at 225º, went out to dinner, and finished it off late that night. Strain through a chinois (or cheesecloth), cool and reserve.

Notwithstanding the use of pork bones, this is not a tonkotsu broth. It was rich, and intensely porky, but it didn't have that dense, milky quality, which I think may come from using marrow bones and/or cooking for an even longer time. But it was some good stuff nonetheless.

Speaking of pork, I needed to make some. I didn't have belly, but I could easily get shoulder, and there are few things as simple and delicious as the Momofuku "pork shoulder for ramen" recipe. Again, it just takes some time. The ingredient list: 1 pork shoulder (I used a bone-in shoulder that was about 5 lbs but you can use boneless); 1/4 cup salt; 1/4 sugar. Mix the salt and sugar, rub all over the pork, and let it sit for a night in the fridge. Pull it out, brush it off a bit, drain off the liquid, and cook it (in a relatively snug roasting pan) for 6 hours at 250º, basting every so often with the rendered fat. I actually started the temperature at 275º for an hour to get some browning happening, and then turned it down for the rest of the time. Let it rest for half an hour, then shred the meat with two forks. Done, and awesome.

(continued ...)

Tuesday, December 7, 2010

CSA Week 1 and Its Uses - Part I

Here in South Florida, as winter descends on the rest of the country, we enter our prime growing season, and the CSA I've joined (through Bee Heaven Farm) started up the week before last. My first experience with a CSA was last year, and I started the season with the ambitious goal of documenting my use of everything in each CSA box (you can see how that ended up). I've learned my lesson: often it's just not that interesting, and sometimes everything doesn't get used up. Which is embarrassing and lame. So this season I won't try to make this a regular topic, but instead maybe just an occasional feature.

CSA Week 1

Over at Redland Rambles, every Friday they give a preview of what is coming in the box the next day. Week 1 brought daikon radish, pak choy, green beans, "Japanese spinach" (a/k/a Savoy spinach?), dandelion greens, cherry tomatoes, garlic chives, parsley, and flowering thyme. I've been wanting to try to make a home-made kimchi for a while now, and decided that would be the fate of the daikon and pak choy.

Where better to start than the Momofuku cookbook for guidance?[*] Though Napa cabbage is the vegetable most typically used in kimchi, daikon is actually fairly common as well; indeed David Chang's book suggests substituting daikon for cabbage using the same recipe. The pak choy struck me as similar enough to Napa cabbage that it would work in the mix too.

I cubed the daikon in about 1/2" chunks (2 medium daikons) and sliced the pak choy in ribbons of about the same thickness. These were then aggressively seasoned with about 2tbsp each of salt and sugar, then sat overnight in the fridge.

daikon and pak choy

The next day I mixed up a paste of garlic, ginger, chile powder (1/2 cup),[**] fish sauce (1/4 cup), usukuchi soy sauce (1/4 cup), salted shrimp (2 tsp.) (more on this below), and sugar (1/2 cup). The Momofuku recipe called for a whopping 20 garlic cloves per one head of cabbage, which seemed a bit over the top, and I cut that in half. It also called for 20 "slices" of peeled fresh ginger - not knowing precisely what a "slice" is, I used an amount about equivalent to the garlic. Then some julienned carrot (1/2 cup) went in; I also threw in the CSA garlic chives, in lieu of scallions. The daikon and pak choy were then drained (they will throw off some water after being salted) and added to the mix. Here's the mise en place:

kimchi mise en place

and everything thrown together:

daikon & pak choy kimchi

(continued ...)

Tuesday, June 8, 2010

CSA - Reflections on a Season

It's been more than a month since I picked up the last box for our CSA (Community Supported Agriculture) share through Bee Heaven Farm. I've always been amused at how South Florida's growing season fades away right as the rest of the country's season begins: it was literally about a week after our last delivery that the rest of the blogosphere started to bloom with discussions of CSA programs and farmer's markets. For us here in South Florida, it's mostly mangoes, lychees and avocados until the fall.

For those who are unfamiliar, Community Supported Agriculture is a way of shortening the chain between farmer and end-consumer. Before the growing season begins, farmers sell subscriptions to a share of their product for the season; then over the course of the season, the customers get their share - whatever happens to be harvested at that particular time - direct from the farms. The Bee Heaven Farm CSA that I subscribed to actually consolidates the products of several local farms, and delivers them to several drop-off points throughout Miami-Dade and Broward Counties.

The season was for twenty weeks total, and you have the option of subscribing to a "full share" or a "half share." For those interested in the nitty-gritty details, the price of a full share was $630, the price of a half-share $375. With an extra $40 added for using a Miami-Dade pick-up location, our total cost for a half-share amounted to a little more than $20/week. To get an idea of what that gets you, you can look at the newsletter archives, which listed each week what was in the box. That may seem a bit steep, but during the season, the CSA basically supplanted our grocery store vegetable-buying (for a family of four who, I will confess, were not cooking at home nearly every night of the week), other than for staples such as onions, carrots and celery (each of which would make occasional appearances in the box, too).

This was my first season trying a CSA, and I'll admit I did so with some trepidation. I'm an enthusiastic but infrequent cook, and the notion of plowing through an entire box of vegetables every week was somewhat daunting. In addition, one of the mixed blessings of CSA programs is that it is quite literally market-driven. Unlike going to the grocery store, or even a farmers' market, where you can go in with a fixed notion of what you want to make that night, what's in the box - and what you'll be cooking - is dictated entirely by what the farms have planted and what's ready for harvest that particular week.

Miami has, for the most part, struggled to really support genuine farmers' markets. Often what style themselves as "farmers' markets" are really nothing other than folks who buy and resell produce from wholesalers, along with an assortment of vendors selling flowers, candles, and various knick-knacks. You'll often be hard-pressed to find an actual farmer, or even sometimes any produce that has actually come from local farms. That may be changing some with Bee Heaven and others' participation in the Pinecrest Farmers Market this past spring, and the nascent Roots in the City market in Overtown. But even in places where farmers' markets are better supported, the "Where's the Farmer?" question still comes up, and it may well be that programs like CSAs are, in some places, anyway, a more efficient means of doing business than farmers' markets.

I can't claim that I managed to cook everything every week. I also can't claim that I enjoyed everything. Truth is, while I am almost entirely omnivorous, there are some things I don't get too excited about: green peppers, zucchini, and yellow squash are a few of the things on that short list. On the other hand, we love just about any form of greens, and there were many which made regular appearances in the box: swiss chard, dandelion greens, collards, calalloo, bok choy and more. I adored the little French breakfast radishes we got occasionally, even if they were primarily an excuse to break out some butter and good salt. We learned that our resident tropical fruit maven, Little Miss F, loved canistel; though even she never got truly excited over black sapote.

(continued ...)

Saturday, March 20, 2010

CSA Carrots - Check!

I know I swore off posting pictures of my CSA share, but - check out this carrot!


There were about a dozen more of these knobby little guys in the share this week; too bad I don't have a wood-fired oven like at Michael's Genuine to roast them in.


Monday, March 15, 2010

CSA Collard Greens - Gomen Kitfo

I can no longer keep track of which week is which from my CSA shares. Since collard greens make a frequent appearance, this is a recipe that can hopefully come in handy. Gomen Kitfo (or Yegomen Kitfo) is an Ethiopian dish which, frankly, one of our good friends makes much better than I do, but that didn't stop me from trying it anyway. What I find so intriguing about Ethiopian food is that it is generally highly spiced, but without being "spicy" (i.e. hot), using a palette of spices that we don't encounter often in Western cuisines, at least not in savory dishes. This dish is a good example: it features cooked collard greens mixed with cottage cheese flavored with cardamom, ginger, cinnamon, clove, garlic and onion.


As usual, I looked at a few different recipes and then sort of mushed them together. Here's a rough ingredient list:

  • 12 oz. cottage cheese
  • 2 lbs. collard greens ( I suspect my pile was shy of 2 lbs)
  • 4 tbsp. butter
  • 3 cloves garlic
  • 2 tbsp chopped onion
  • 1 tbsp chopped chile pepper (I used jalapeño)
  • 1 cardamom pod
  • 2 cloves
  • 1 tbsp fresh ginger, grated
  • 1/2 tsp ground cardamom
  • ground clove, ground cinnamon (to taste)
First, make some ghee. Ghee is just clarified butter, which is something that always used to sort of intimidate me, until I figured out it's not exactly culinary rocket science. Here's how I make clarified butter: put some butter in a pan. Turn on low heat. The butter will melt. Some solids will drop to the bottom, some stuff may float to the top, everything else will be transparent and golden. That's what you want. Skim the stuff off the top, leave the stuff on the bottom. Some recipes I saw called for a flavored ghee ("niter kebbeh"), which sounded like a good idea, so I threw a bit of garlic, onion and ginger in there (just some generous pinches of each) along with a lightly crushed cardamom pod and a couple cloves. Rather than straining through cheesecloth or anything fancy like that, I just skimmed what I needed for the dish straight out of the pan.